
LUCYBODY
LUCYBODY
The process for creators of textures is to drag & drop textures in the HUD, select the target and add it to the applier button. The word "target" means the objective of each time a different texture is sent to the Applier by pressing the ADD to Applier button. The target are the links and faces of the mesh where textures will be applied with the applier button. You can use the green button "ADD to APPLIER" with different targets as many targets added as you need to use it in one click of the button applier for customers. By default the HUD is without target selected, no tint color, and selected the texture type diffuse.
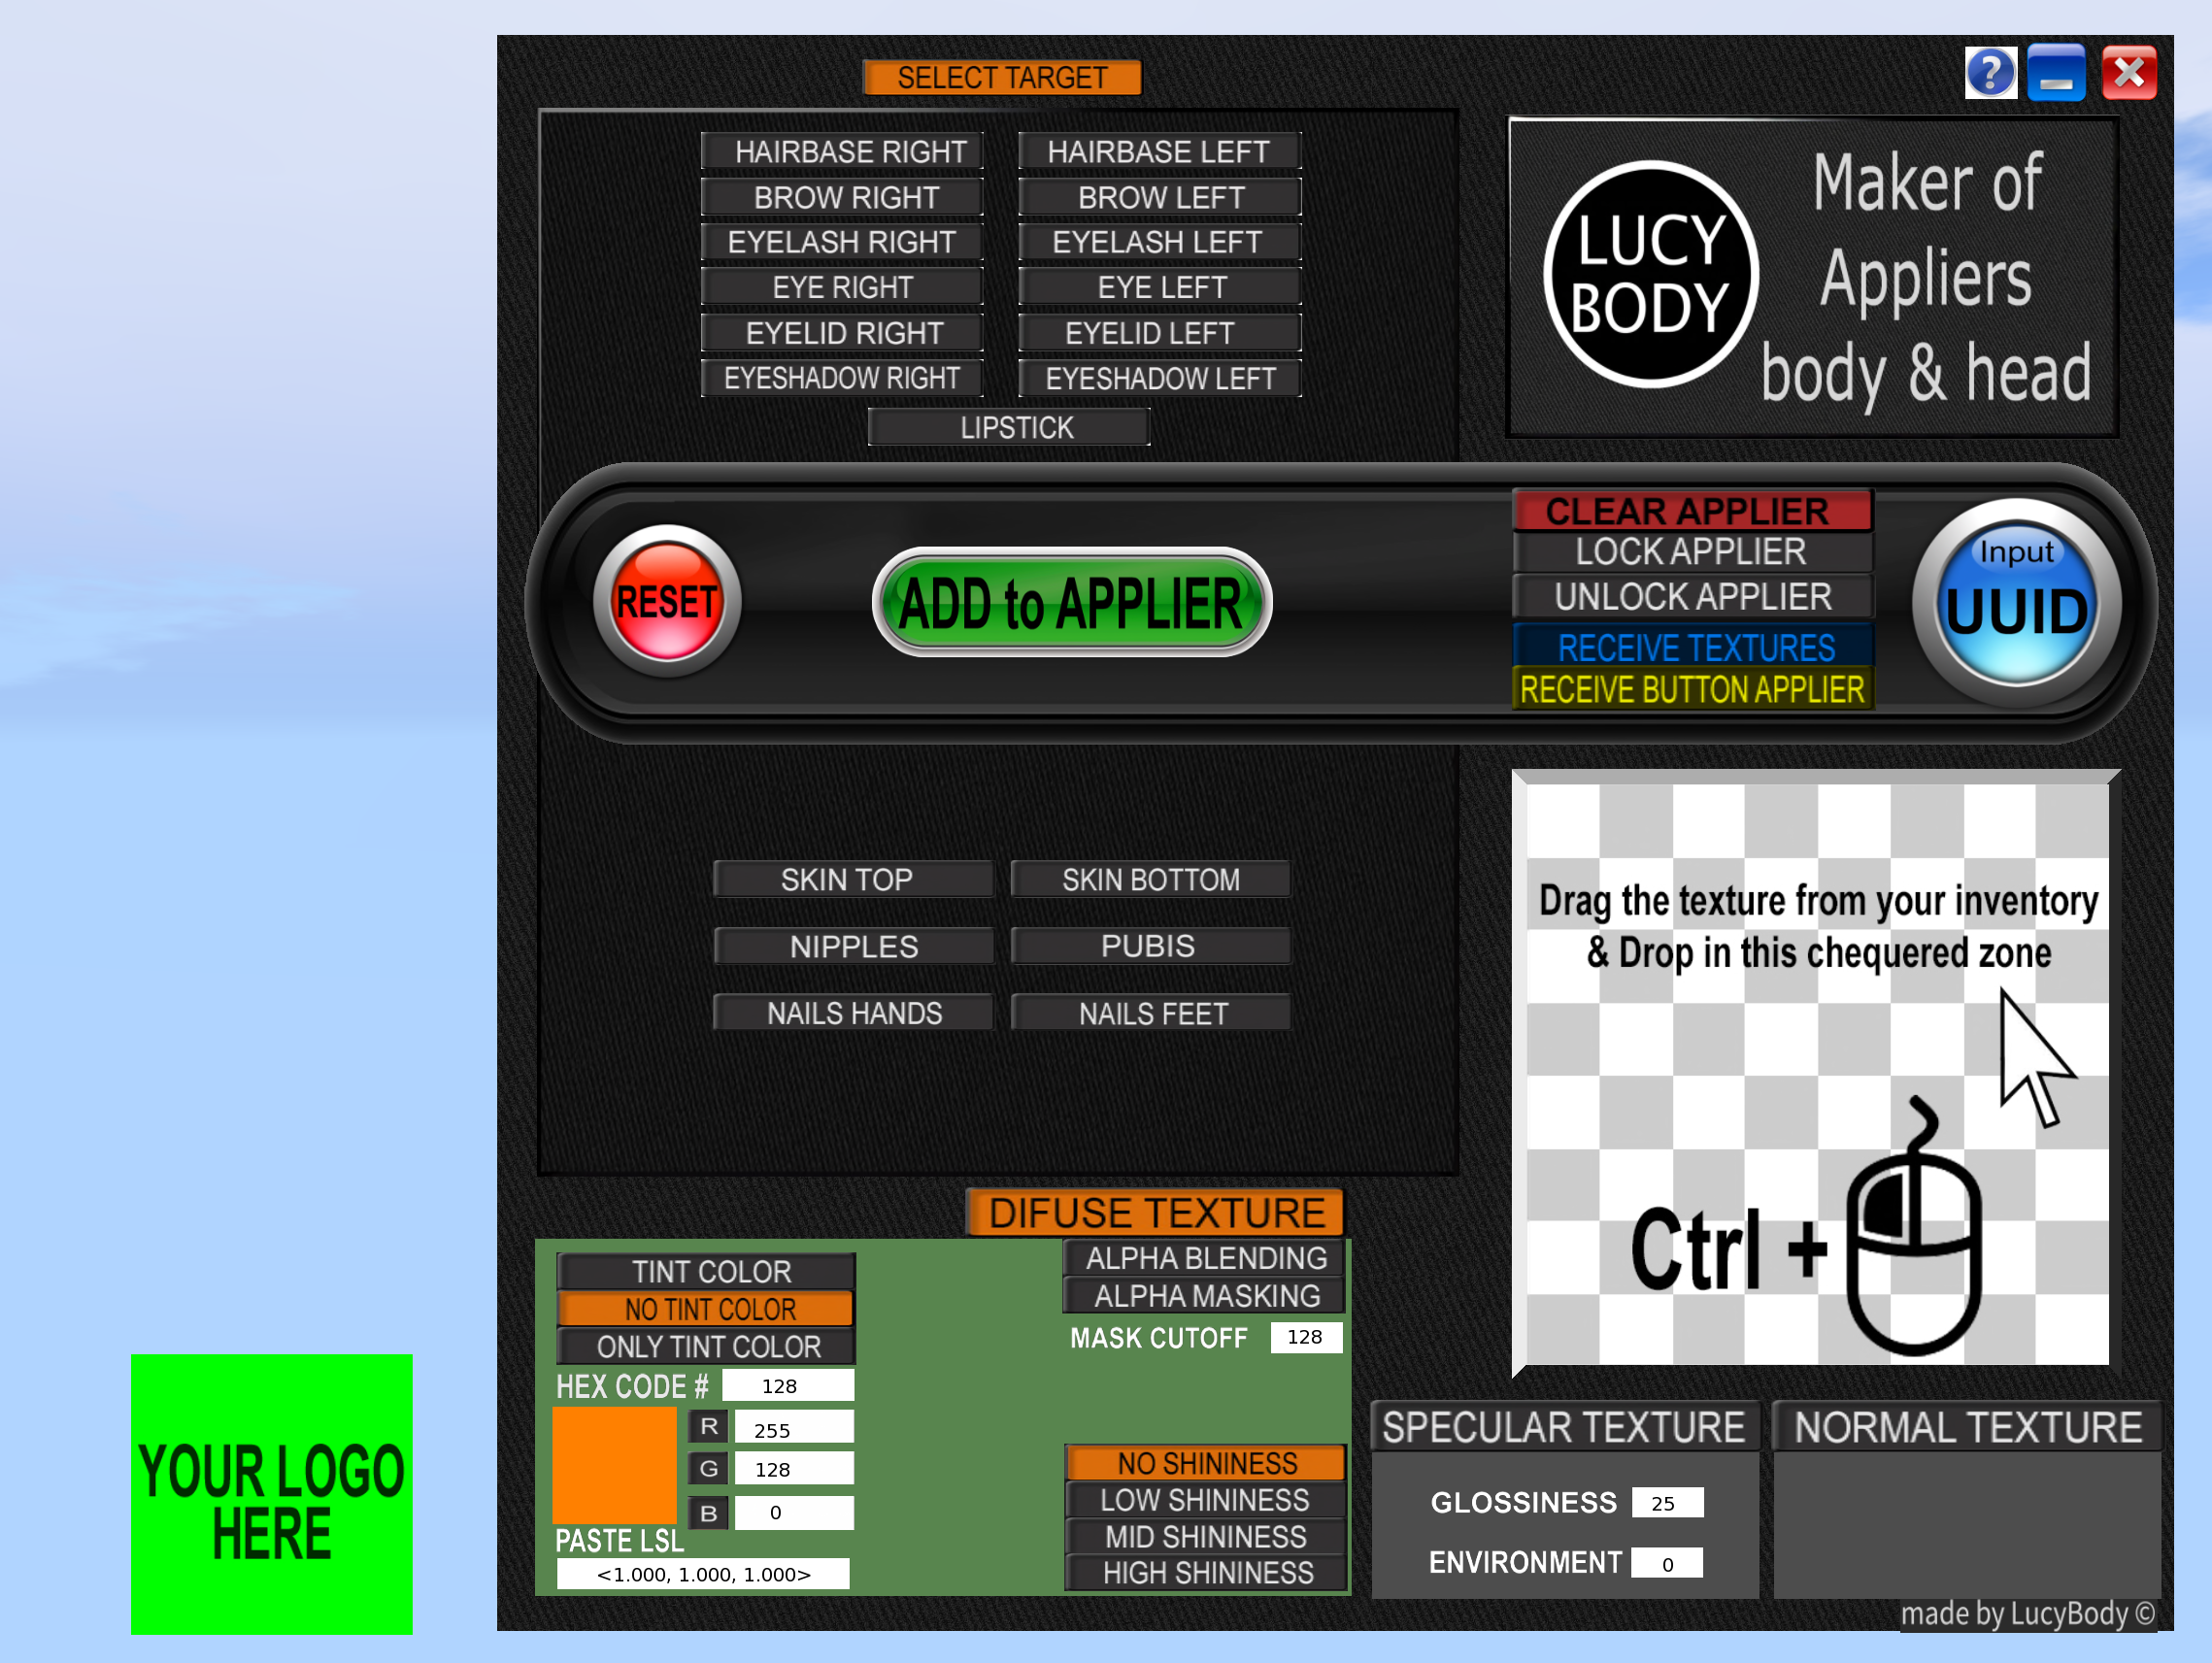
The green square on the screen is the Applier button for your customers. The green color means you can receive data, it is in unlocked mode, but you can change it to locked mode in the HUD. In locked mode it does not save data. This button to make the applier has no texture, is for you to customize it to your taste. The button has a script inside it, you can use the script in your own prims if you want. The HUD and the Applier button need to be weared on your computer screen. But after wear the button one time you can rezz it, this is needed to receive data from the HUD. Example of using an applier for skin of a body. You drag & drop the top texture, and select in HUD Skin Top, then press the ADD to applier button, then drag & drop the bottom texture from your inventory, and select in HUD Skin Bottom, then press the ADD to Applier button. Finally, Lock. That's it, you have a button with a body skin applicator, with the 3 textures included. It is good idea to click each button slow to give the time needed for the scripts working. Important: You must use CTRL when holding the left button of mouse, for drag & drop the texture in the checkered zone. In the following image we will review the HUD button zones in more detail.
In the following image we will review the HUD button zones in more detail.
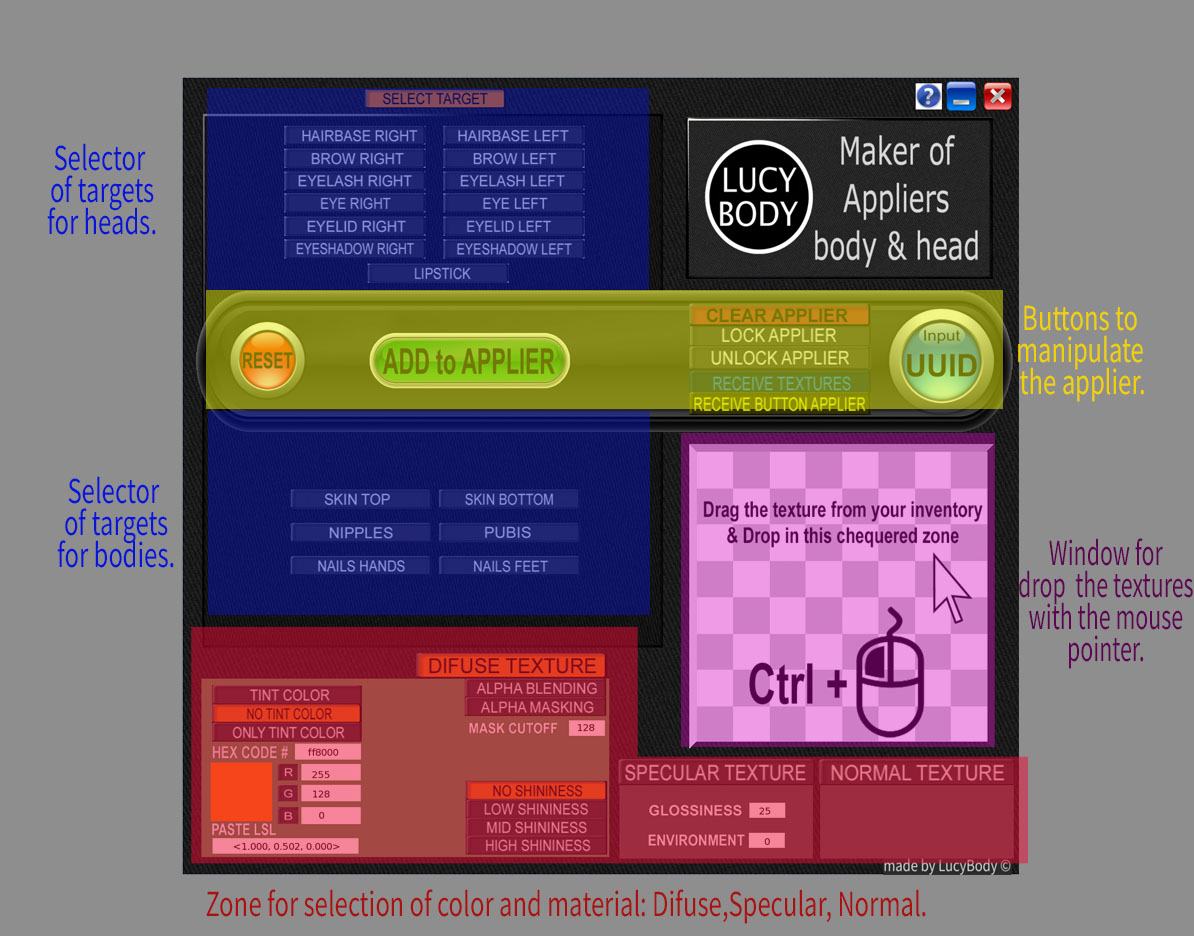
Rules for Color and Materials: In the area of materials, there are three distinct options for each target: Diffuse, Specular, and Normal. The Normal texture has no options; it is the texture that gives the effect of relief or bumpiness. The Specular texture has glossiness and environment options. The Diffuse texture, which is the image texture, has the most options. There are three options for Diffuse texture: Diffuse, Alpha Blending, and Alpha Masking, with the latter having mask cutoff options. The Shininess options are only for diffuse textures and only if they are opaque; they have no effect on transparent textures.
There are three color tinting options: colorless, with color in texture, or color tinting without texture. This means applying color tinting to the texture already in the mesh. The color tint is applied to Diffuse, Alpha Blending, and Alpha Masking. Color values can be entered in several ways: by the LSL value, Hex value, or RGB values. You can also edit the color square, but this method is only recommended for advanced users because you must select the edit linked square. However, this is highly risky as it could change the color of the entire HUD, which is not recommended.
The Applier button (the lone button) is capable of storing lots of data, one after the other, like a convoy of targets with their color and material values, for different targets, the same target, or a mixture of both. I have tested more than 60 lots in one button applier. Each batch is sent by the ADD to Applier button from the HUD. This button can be joined to others, forming a group of prims, a HUD. You can use the prim with full permissions or you can also use your own prim to make your buttons or HUD, but the script must be placed inside the prim before saving data and must be worn on screen. Remember, the specific green color means locked. This is a must if you save data in a lot of buttons; you need one green button to save data.
Now you can use the UUID direct input instead of inserting texture into the HUD.
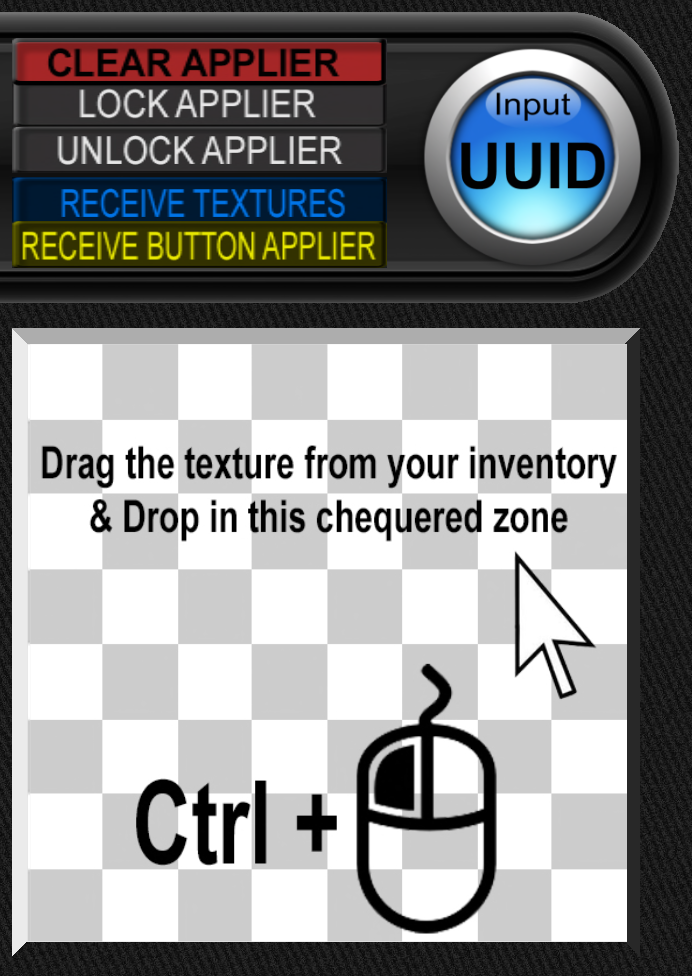
Remember that to get the Applier full permissions button, you must get it now by pressing the RECEIVE BUTTON APPLIER button, the yellow button.
©2024 LucyBody